Perfect Pie crust
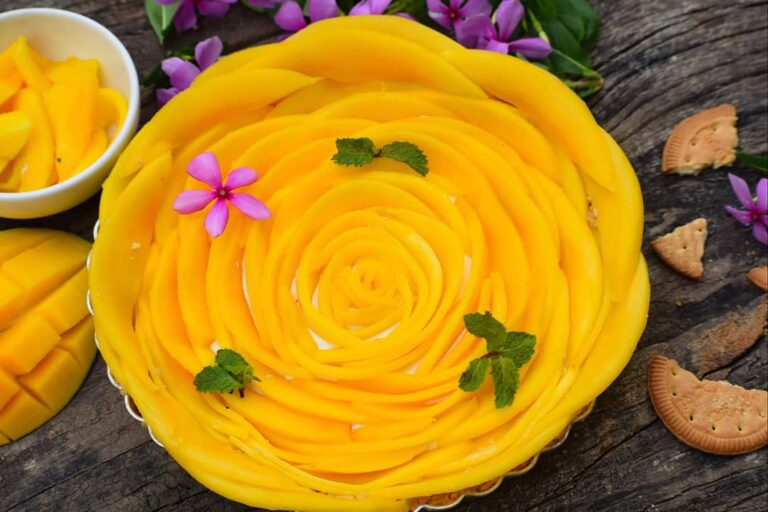
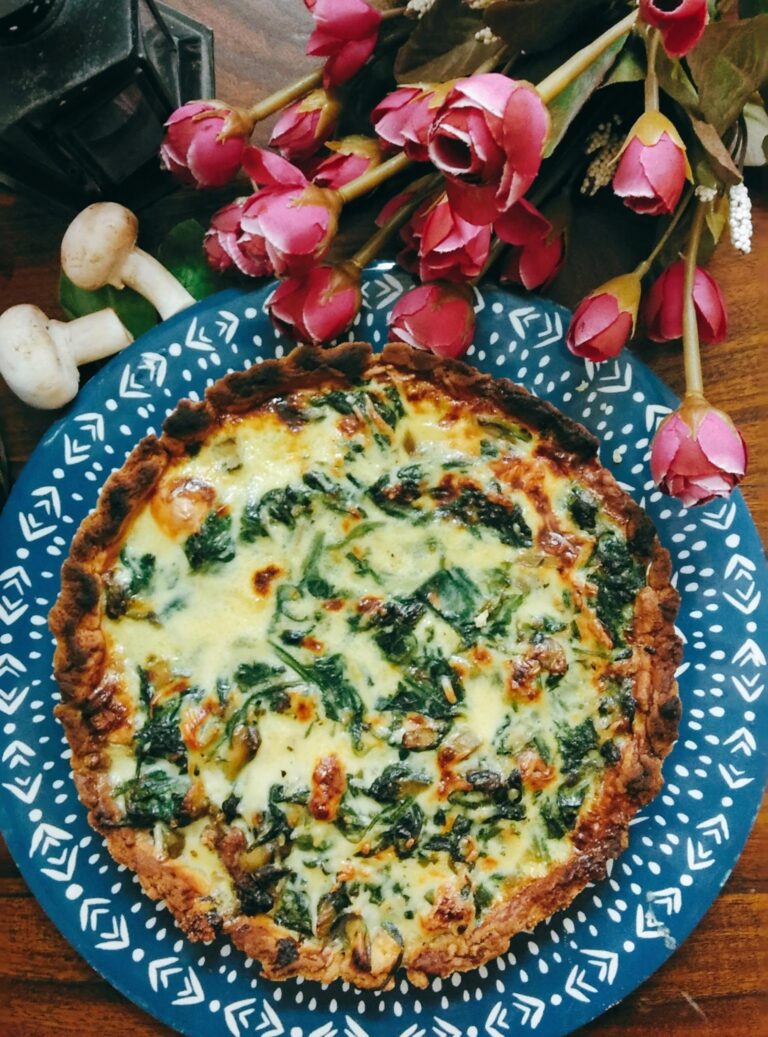
An easy recipe and step by step tutorial for how to make home-made Pie crust or tart-shell. I’ve use this recipe for making Apple Pie, Mango Tart, Strawberry Tart, Blueberry- chocofills Tart and even Spinach & Mushroom Quiche. You can also make mini Tarts using the same recipe. Do not forget to go through the notes and follow them religiously to ensure perfection! I use this Pie crust when making my favorite- Spinach & Mushroom Quiche
Perfect Pie crust
Equipment
- 1 Rolling Pin
- 1 tart pan
Ingredients
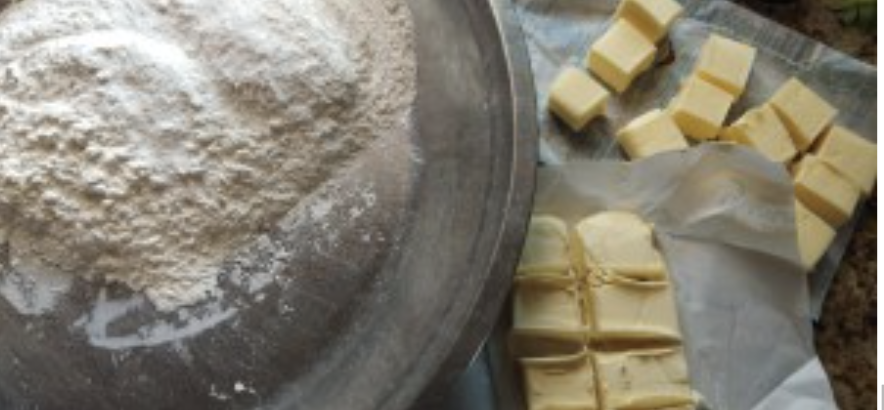
- 2 1/2 cup All-purpose Flour
- 1/2 cup Butter
- 1/2 cup Vegetable Shortening/Nutralite
- 1 tsp salt
- 6 tbsp Ice-cold Water
- 1 tsp sugar optional
Instructions
- Chill Everything except salt and sugar in the fridge. Everything should be chilled.
- Mix Flour, Sugar and Salt. Then Add cut pieces of chilled Butter and Shortening.
- Combine everything with hands fastly. Add one tbsp water at a time and keep combining.
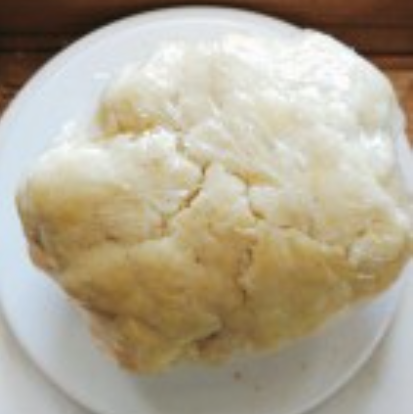
- After you have added 6 tbsp, the dough must have combined.
- Divide the dough in two and wrap it in cling wrap and put it in the fridge to chill for minimum 30 minutes.Remove one crust disk from the refrigerator. Let sit at room temperature for 5-10 minutes in order to soften just enough to make rolling out a bit easier.
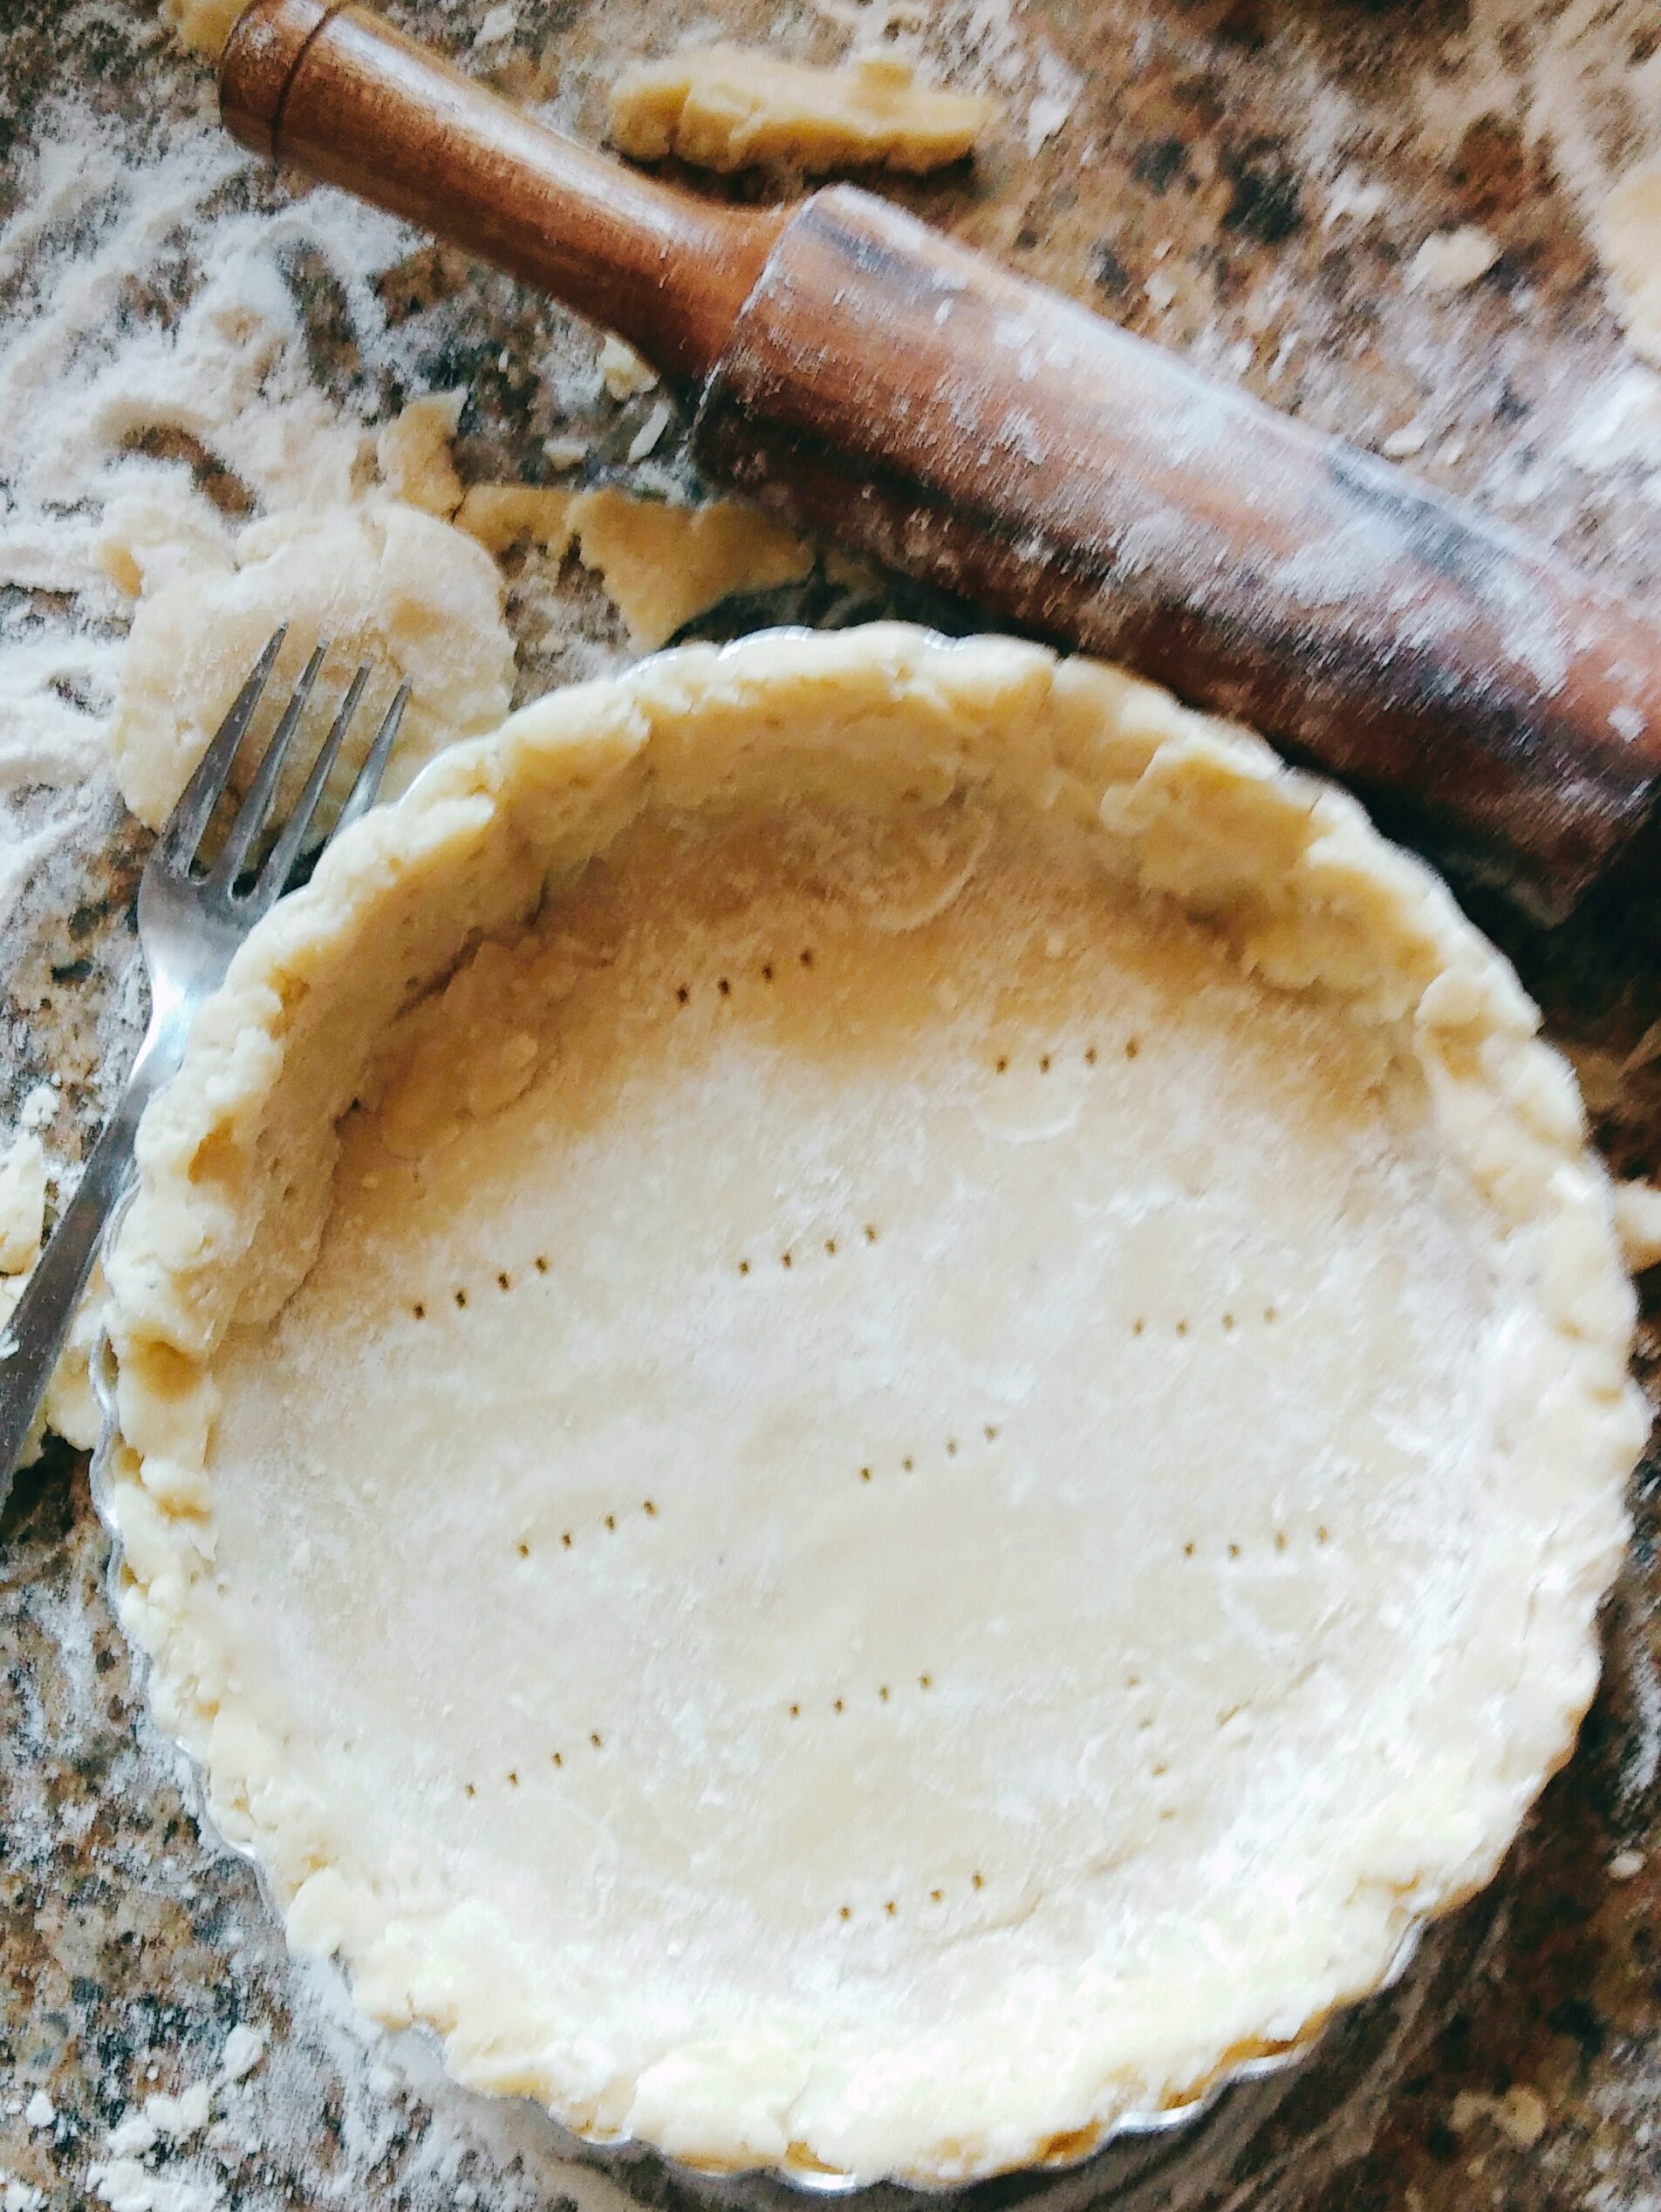
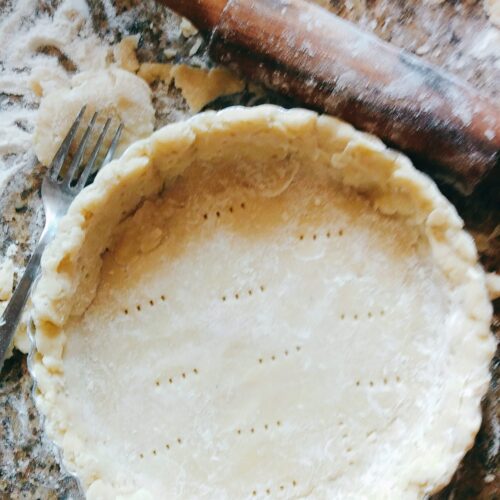
- Roll out with a rolling pin on a lightly floured surface to a 12-inch circle; about 1/8 of an inch thick. As you roll out the dough, check if the dough is sticking to the surface below. If necessary, add a few sprinkles of flour under the dough to keep the dough from sticking.
- Carefully place onto a pie plate. Gently press the pie dough down so that it lines the bottom and sides of the pie plate.Use a pair of kitchen scissors to trim the dough to within 1/2 inch of the edge of the pie dish.
Freeze the crust it for at least a half hour, until chilled. This is an important step in pre-baking. Otherwise, the crust will slip down the sides. Preheat your oven to 180 degrees
Notes
**Very Important
- Use Very Cold Butter and shortening cut into pieces for the flakiest crust. If it gets warm while working it out, you can freeze it for 10-15 minutes in between too.
- Do not over-mix the dough, even if it has a few chunks left to be mixed. Mostly it should be cornmeal consistency.
- Use the prescribed amount of chilled water. The reason why we aren’t using much water is that water aids in gluten development, which you want to avoid for tender pie crust.
- Before you chill or roll-out the dough, take the time to shape it into an even disk less than 1-inch thick and with smooth edges. Well-floured hands and a well-floured work surface will make this easier. This will make the dough much easier to roll out quickly and evenly and will help avoid cracking on the edges.
- Chill the dough before you roll it out for at least 30 minutes and up to 2 days. Again, if it is very hot out, think about freezing the dough for 10 minutes just before you start to roll it out.
- Roll out the dough on a very well-floured work surface with a well-floured rolling pin. With each pass of the rolling pin, turn the dough a quarter turn (about 90 degrees). This will let you know the dough is not sticking. If it starts to stick at all, lift up one side of the dough and throw a bit of flour underneath.
- When you line the pie pan with the dough, lower the dough into pan and lift up the edges and let the dough fall down into the “corner” rather than pushing or forcing it. Dough that is stretched will simply pull back to its original shape once baked.
- Cover and chill the lined pie pan (and any rolled out top crust) before blind-baking or filling the pie. This will help the pie keep its shape (and size!) when baked.
- There is an odd trend towards under-baked pie crusts. To get the full tenderness and flakiness of a great pie crust, be sure to bake the pie until the crust is fully browning, not just golden brown.